| Permalink: |
How to add WM Keeper WebPro to WM Keeper Standard
Members of the System who manage their accounts only with WM Keeper Standard do not have access to some features of the WebMoney System. WM Keeper Standard does not allow to create more than one purse for the same title unit type. It also has a number of financial restrictions and does not allow you to fully use some of theWebMoney Transfer services.
Access to all the features of the System are granted through the fully functional versions of WM Keeper: WM Keeper WinPro and WM Keeper WebPro. Members of the System can change the primary purses operating mode. With them there is still, the possibility of managing them via WM Keeper Standard, as the restrictions are cancelled.
To change the primary operation mode from WM Keeper Standard to WM Keeper WebPro a member has to obtain a Formal passport with a verified phone number and e-mail address. Please note that the phone number verified in WM Keeper Standard may not be specified in the passport. To verify or update the phone number and e-mail use the folowing instructions.
Adding WM Keeper WebPro to an existing Keeper Standard account is performed in three steps.
- Changing the operating mode.
- Requesting personal certificate.
- Getting a WM Keeper WebPro personal certificate.
1. Changing the operating mode.
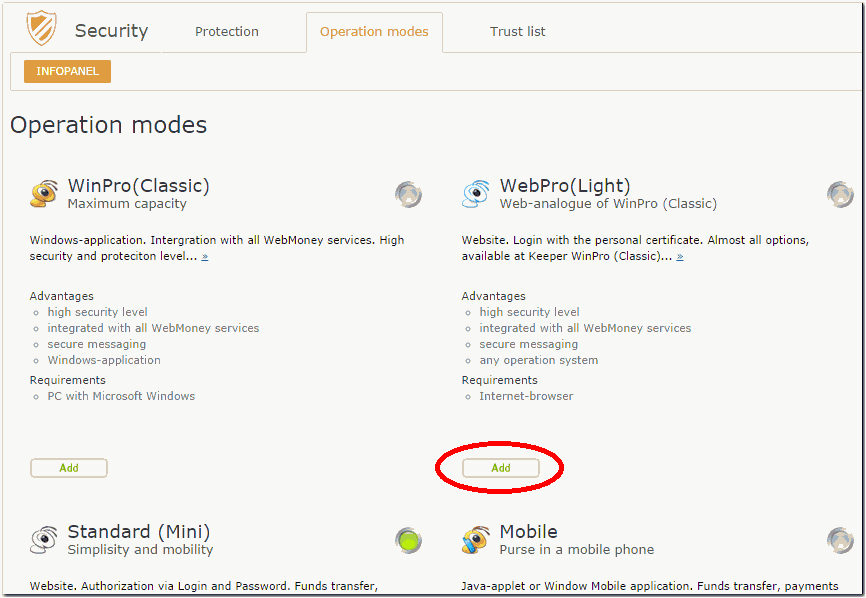
To change the operating mode you should open the Operation modes section of the Security service site.
Go directly to the operation modes management on the Security service site .
On the opening page click on the "Add" button in the "Light" section.
To continue the adding procedure you should have a verified phone number and email address in the passport. If it has not been specified earlier then you will be prompted to do it on the next page by following the corresponding links to the Passport service site.
If everything is correct, the page will look as shown below.
Others should specify the password for WM Keeper Standard (which will be used to enter WM Keeper WebPro as well) and click on the "Change operation mode" button.
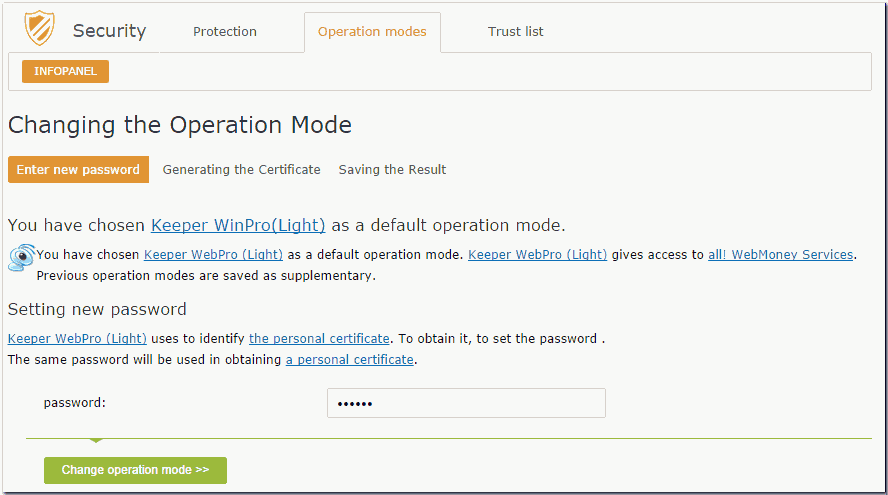
Then it is necessary to look through the instruction on the personal certificate receipt and pass on to the second stage of adding WM Keeper WebPro.
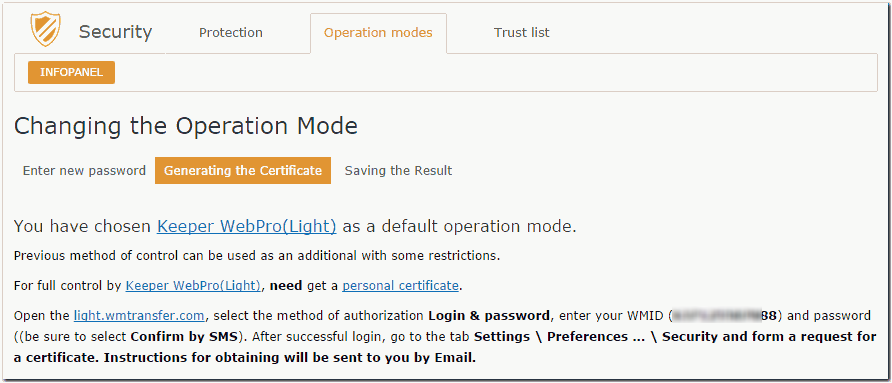
2. Requesting a personal certificate.
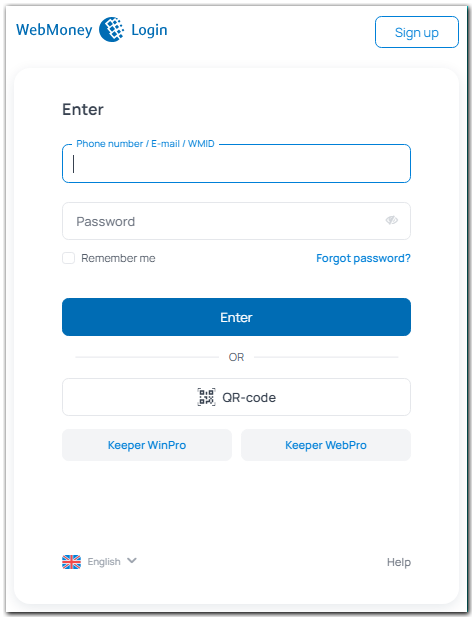
To get a personal certificate you should sign in to WM Keeper WebPro using your login and password.
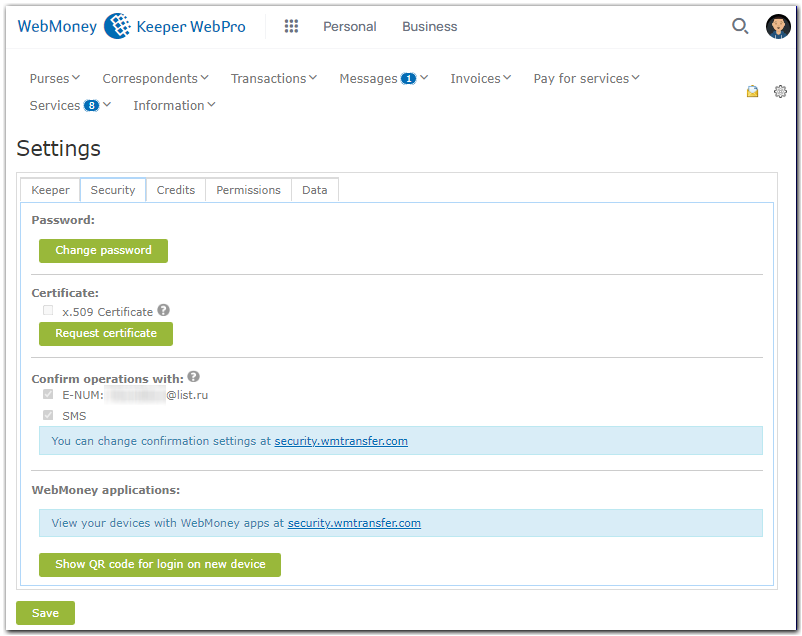
After having received the access to your purses via the WM Keeper WebPro interface choose "WM Keeper setting" item in the "Settings" menu.
Go to the "Security" tab and click on the "Request" button.
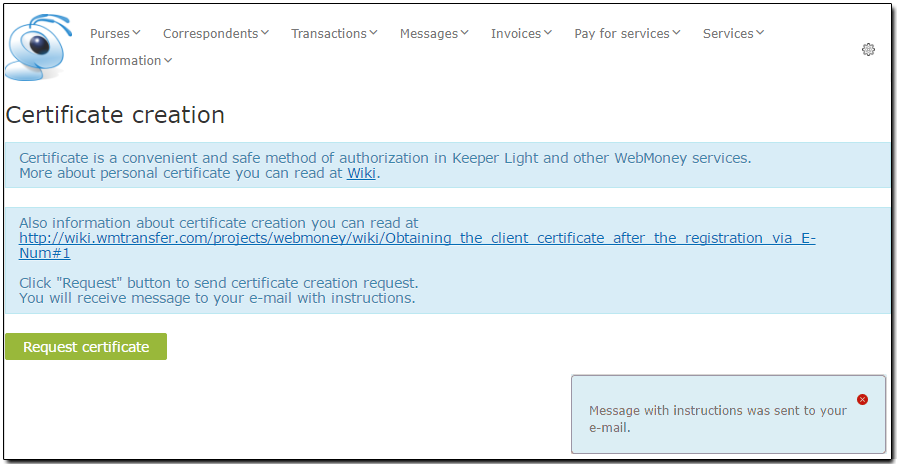
Relogin via login and password with SMS or E-NUM confirmation to request certificate.
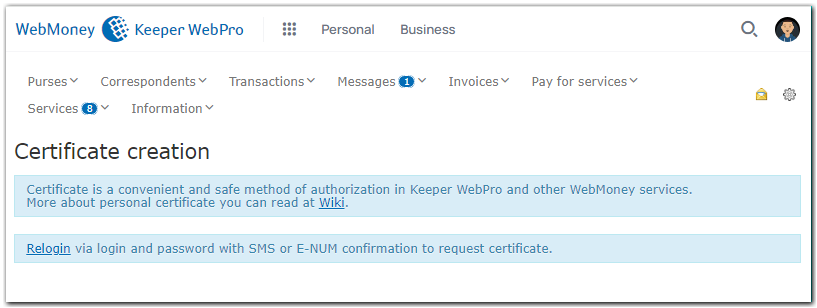
Wait for the success notification.
3. Getting a WM Keeper WebPro personal certificate.
It is recommended that you perform the procedure of getting a personal certificate in Mozilla Firefox or Internet Explorer browsers.
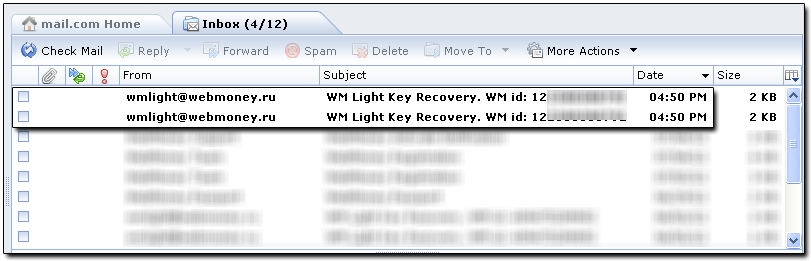
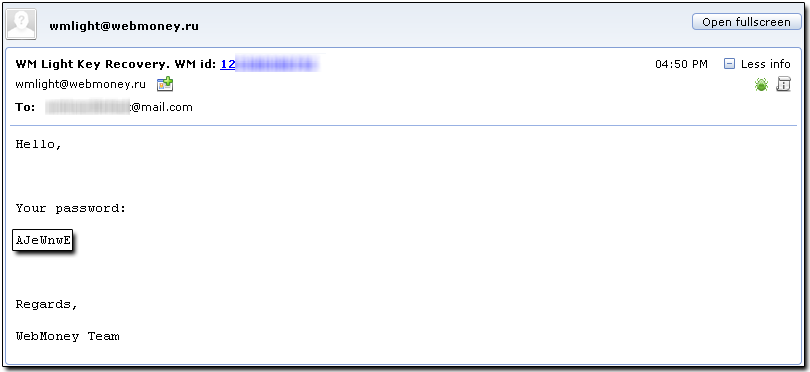
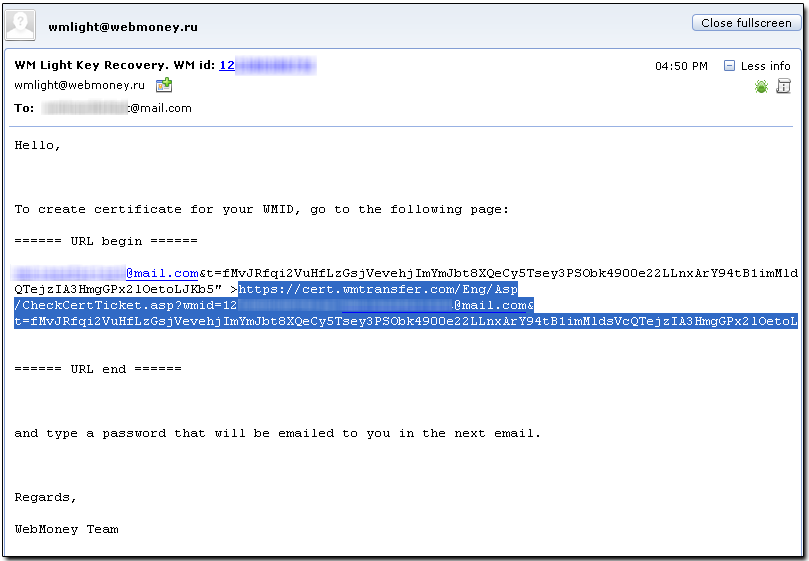
After the successful completion of the request on the personal certificate receipt check the e-mail specified in your passport. There you will find two letters sent from wmlight@webmoney.ru. The first one contains a personal link to a certificate issuing service. The second one - a password necessary to get the certificate.
Open the letter with the password and copy it.
Then open the letter with the link and follow it.
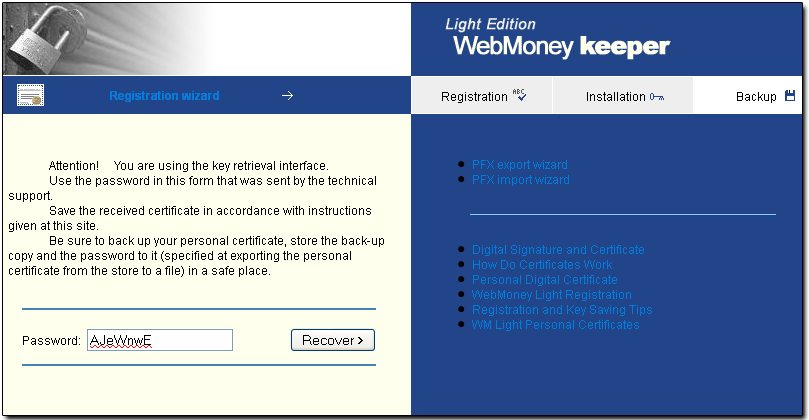
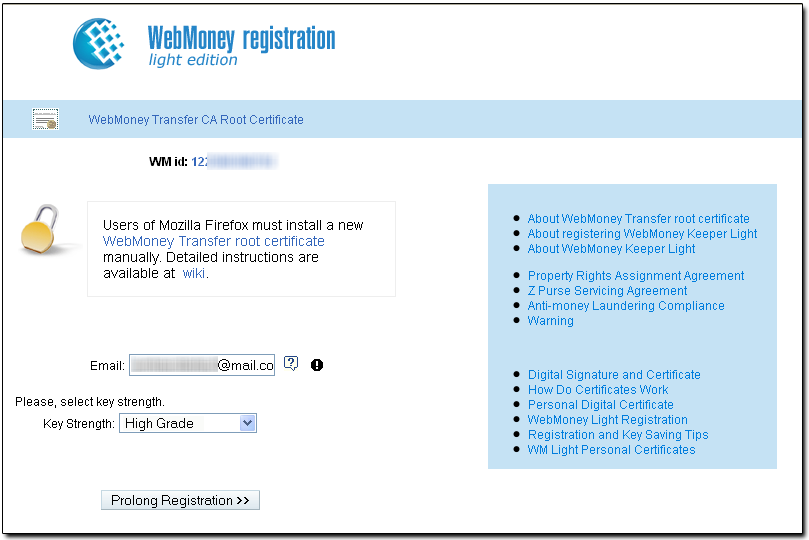
On the page for certificate issuing/recovering service enter the password and click on the "Recover" button.
In the opened window enter your e-mail address. It can be the e-mail specified in your passport or any other e-mail address. This address will be embedded in this certificate with which you will be able to sign your messages.
Choose the key strength. For "High strength" your key will have size of 2048 bits, for "medium strength" - 1024 bits.
Then click on "Prolong registration".
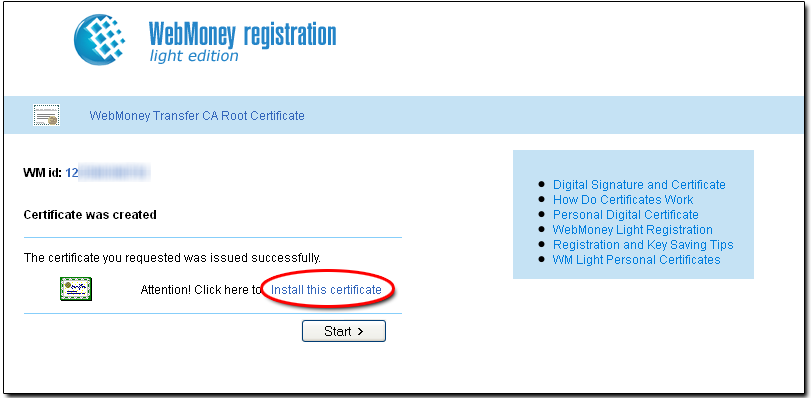
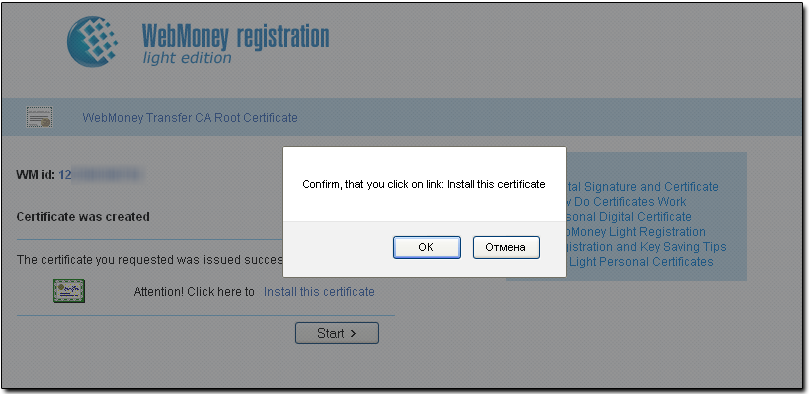
After the certificate is successfully generated you will see the "Certificate issued" message on the page. For its further use it should be installed to the certificates storage. In Internet Explorer the installation will continue automatically. In Mozilla Firefox the "Install this certificate" link should be followed.
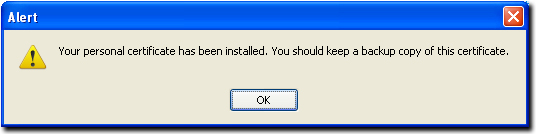
Firefox displays a special notification when the certificate is installed. Look through it and close the window.
On the certificates issuing page click on the "Launch" button and confirm that you have installed the certificate.
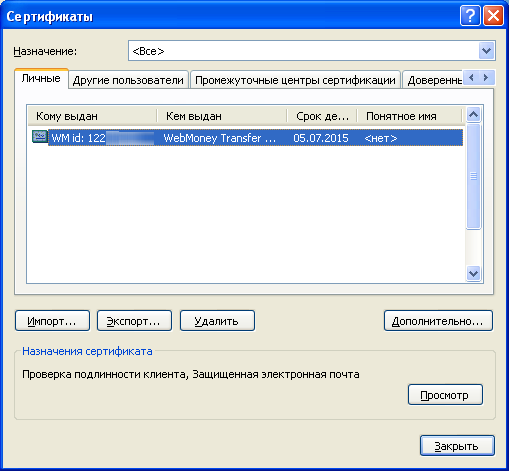
Do not close the browser window without making sure the certificate is kept in storage. To check this in Firefox enter the menu "Tools-Options", "Advanced" section, "Encryption" tab, "View certificates" button.
In Internet Explorer open "Tools - Options". Then click on the "Certificates" button in the "Content" tab.
In case the generated certificate had not been installed to the browser certificates storage for some reason you can complete the installation manually: the certificate, registered and signed by the server (a *.cer file) can be sent to your email. For some browsers (Internet Explorer, Opera) it is enough to simply import the received certificate to storage. For Firefox browser amore complicated installation procedure is needed.
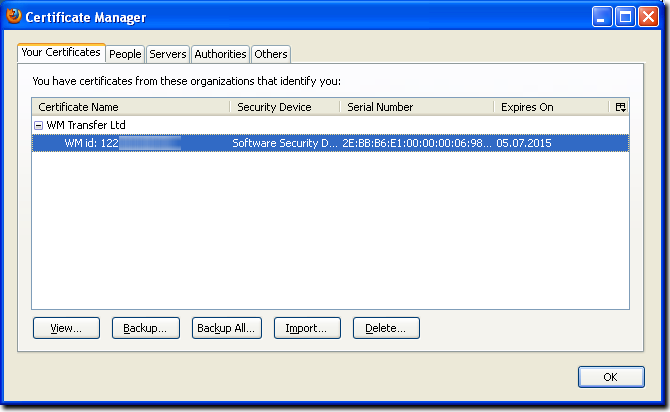
Right after the certificate is received save a backup copy to a removable device. To do this enter the certificates storage and
- in a Firefox browser open the certificates manager, highlight the certificate and click on the "Backup" button;
- in Internet Explorer use the "Export" button.
Detailed instruction on saving a backup copy of the certificate can be found in specific manuals.
Finally return to the certificates issuing service page and click on the "Launch" button.

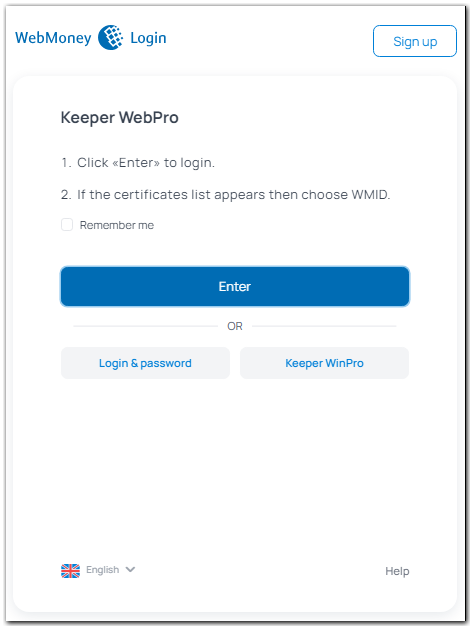
After being redirected to the WM Keeper WebPro click on the "Log in" button.
choose WM Keeper WebPro and click the "Enter" button.
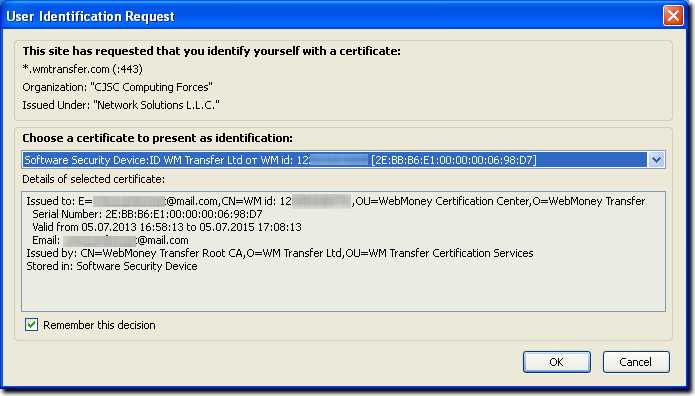
Specify the installed certificate of your WM Keeper and click "OK".
The list of your purses will open.
See also:
WM Keeper WebPro
Personal certificate
Adding new control methods to Keeper Standard
Operation modes